 Lowest Price Policy^
 +40,000 Products
 2 hour Click & Collect
 Easy in-store Returns
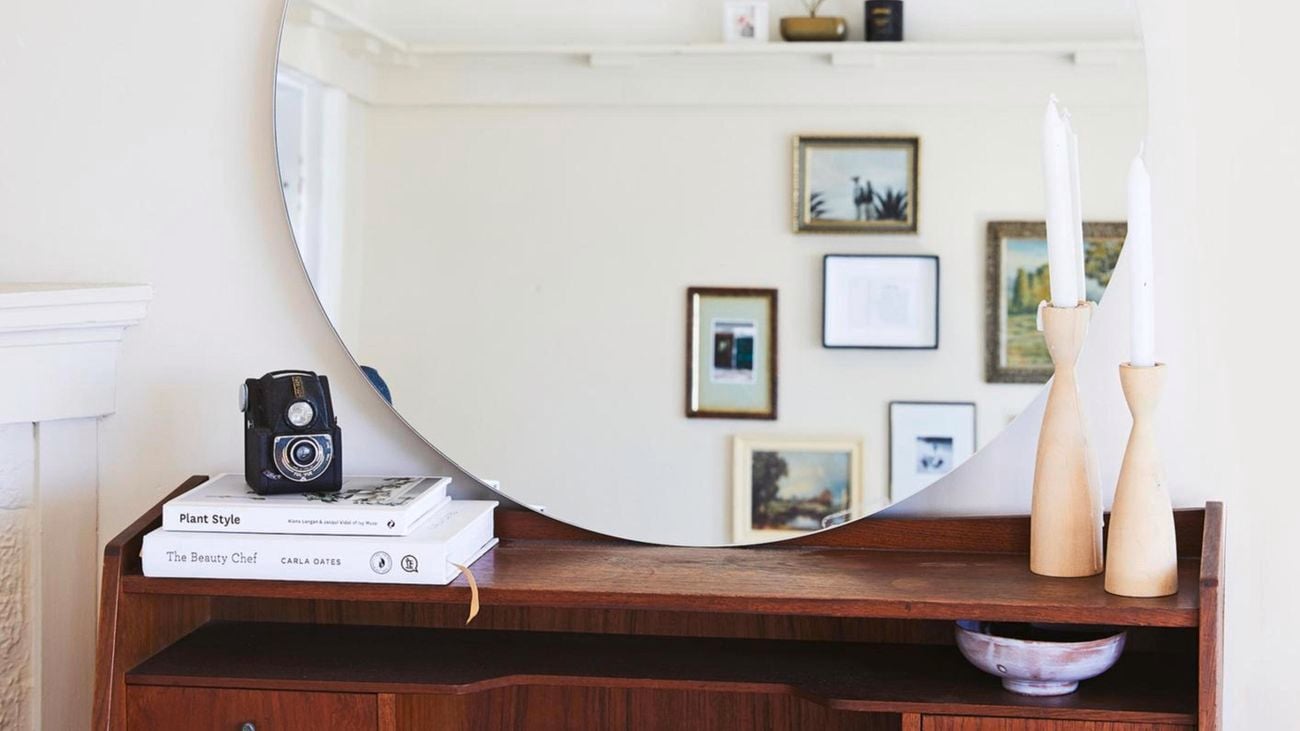


Walls
The best way to hang pictures on a wall

Hanging a picture is a job you want to do once and do well – you don't want to create more work patching up holes that missed the mark. Take your time to work out the best location and arrangement for your art and study our hanging guide, so you know which fixtures to get and how to use them.
The best place to hang an artwork is where you'll get maximum enjoyment from it, but out of direct sun and fluorescent lights, which can fade paintings and photos. Instead, consider placing a mirror opposite a window to reflect views and natural light.
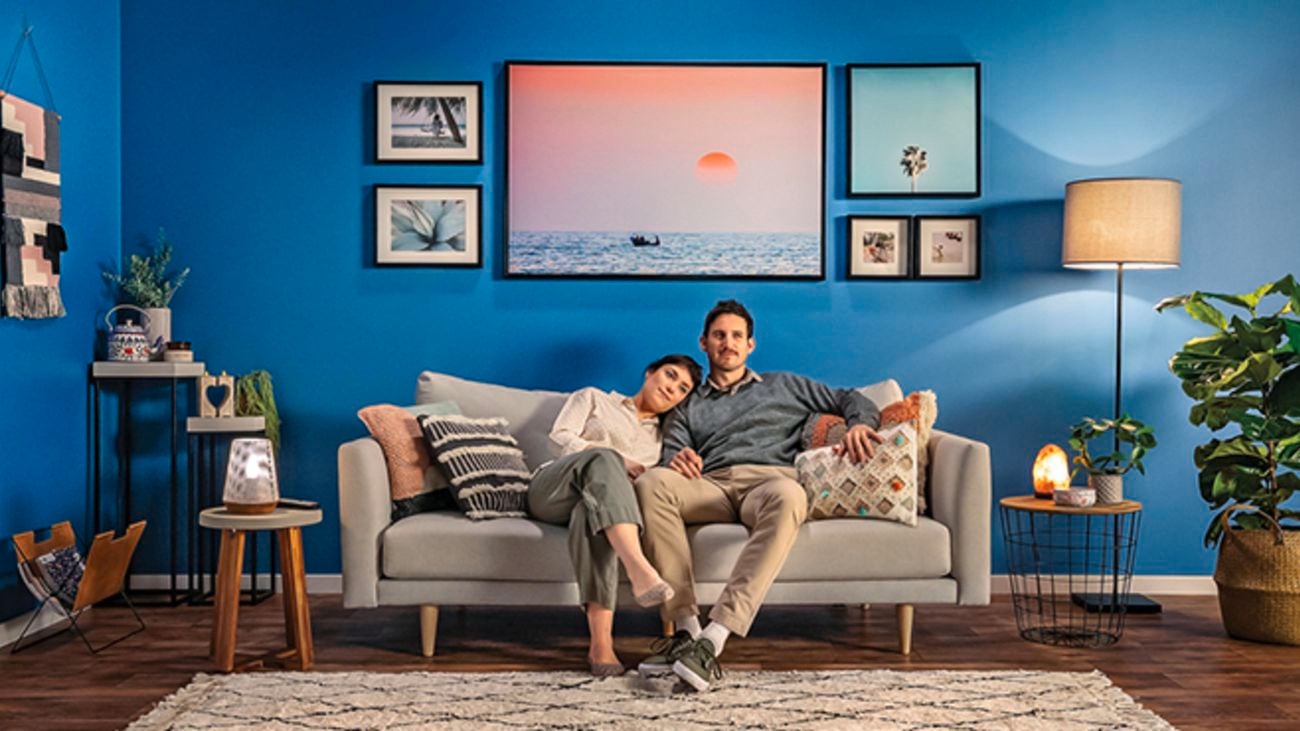
The scale of your wall and the size of your art will influence what piece works where. Larger pieces can look striking on a generous blank wall, while smaller pieces are often better suited to more intimate zones like a hallway or above a desk.
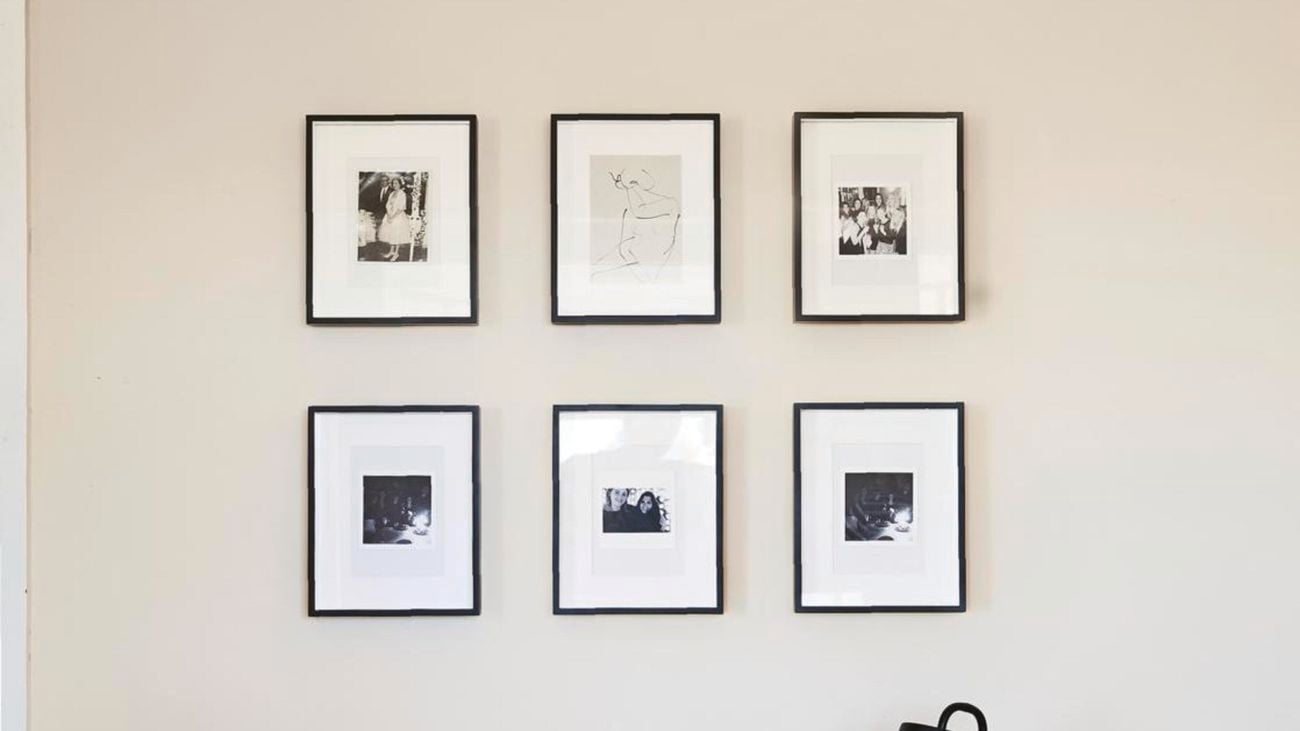
A curated collection of prints, photos and art makes an eye-catching focal point. An eclectic mix hung in relaxed ‘salon style' exudes personality, while a linear layout with a theme – whether it's black-and-white photos or similar frames – will create a unified look.
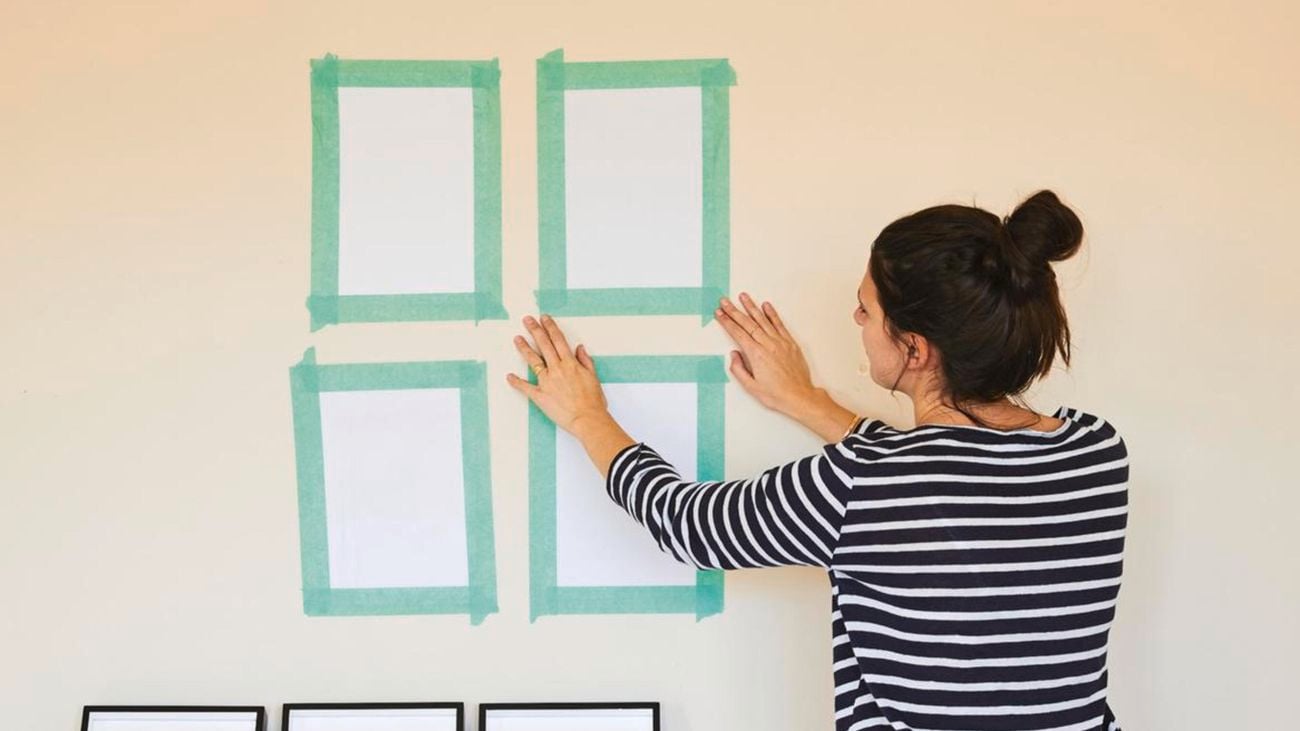
To plan your gallery, 3M senior brand manager Jen McDonnell recommends mapping it out on the floor first: “Use your main image as the starting point and build around it. To define the wall area to hang within, mark it out with masking tape, aiming to leave the same amount of space blank on either side of the wall for balance.”
Rather than default to the centre of a wall, take cues from the furniture layout. As for height, Jen suggests: “Just over halfway up the wall at eye level is an ideal hanging height for most pieces, but it's dependent on personal preference. Wherever you choose, it should be pleasing to the eye.”
Two hooks hold better than one. To ensure they're in the right spot, make two marks on the back of the picture the same distance in from the sides. Hold the picture up by the wire exactly at those marks and measure the distance from the top of the frame to the marks – this is where the hooks need to go.
Remember, if you are hanging two pictures together, the wire heights will always be different, so measure both.
Wall studs are rarely where you want them for optimum aesthetic appeal, so don't stress about finding them. “Two hooks with two angle drive pins will hold a good weight in sound plaster,” says Rob.
For heavier pictures of around 6kg, use hollow wall anchors such as those made by Ramset. “For heavy duty – over 10kg – you probably need interlocking aluminium strips, using several wall anchors,” advises Rob. “On brick walls, use a plastic plug and at least an eight-gauge screw, preferably with a Ramset wall hook.”
Watch the video: How to hang a picture frame from a track
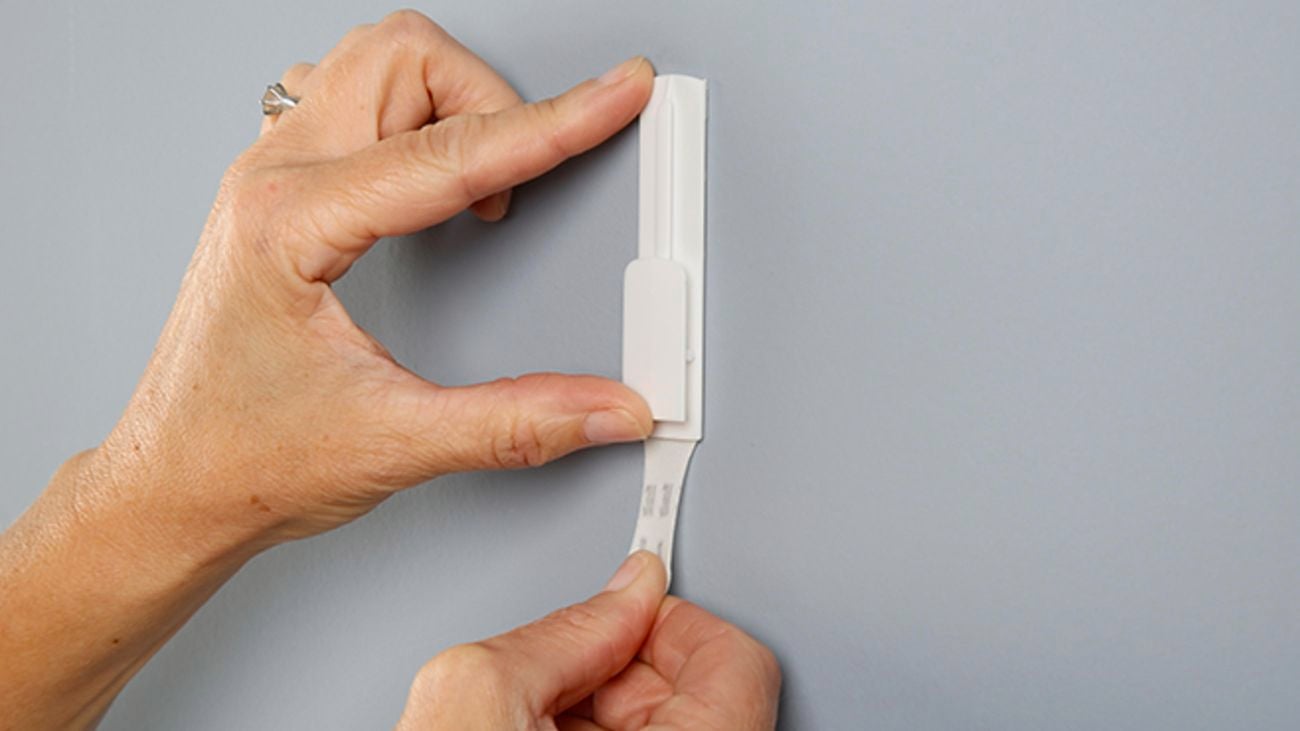
If you're renting and nails aren't an option, there are ways to display without leaving a mark. Command removable picture hangers can hold artworks up to 2.2kg, while four sets of the Command large picture-hanging strips form an interlocking hold of up to 7.2kg.
“For the best results, ensure the wall is prepped correctly by using isopropyl rubbing alcohol, and that pack instructions are followed carefully,” says Jen McDonnell.
Stick within the recommended weight range and, when you need to remove them, never pull the strip away from the wall or towards you – always pull the strip downwards, gliding your hand against the wall to ensure damage-free removal.
Now you know how to do it, it's time to start hanging those pictures! Check out our full range of picture hanging accessories to find what you need.
Photography credit: Cath Muscat


